| |
Do it yourself ...
Pyrography is not necessarily an expensive
hobby : even for about � 100 the basic
equipment, with which the first steps are
made, can be obtained.
In this pages we will show and explain you
the basics about pyrography, and give you some
information about the equipment needed to try
it by yourself.
Only experience can teach you :
There is only one rule in pyrography : only
experience can teach you.
Try it, try it again, day after day, ... and
above all, believe that also you can do it
!
|
|
|
|
|
| |
|
|
| |
| |
|
|

|
| |
|
|
|
| |

|
| |
Not an expensive hobby
|
|
|
Pyrography is not necessarily an expensive hobby :
even for about � 100 the basic equipment, with which
the first steps are made, can be obtained.
|
| |
This basic equipment consists of :
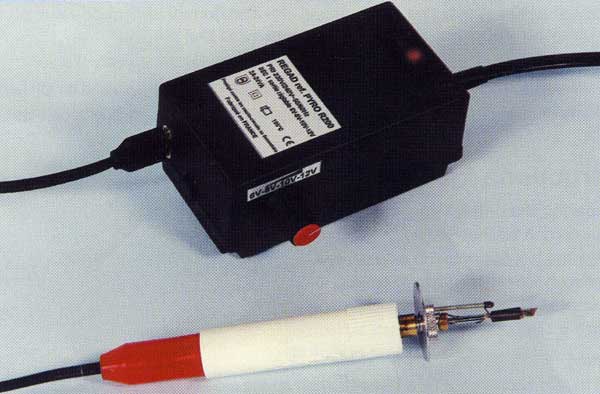 - a transformer, by which the mains
voltage can be transformed into a harmless low
voltage, which is used to warm up the stylus. The
temperature of the stylus can be adapted by
changing the low voltage. This can be done
gradually (3, 6, 9, or 12 Volt) or continuously
between 0 and 12 Volt. The best results are
obtained with a transformer which can be adjusted
continuously. - a transformer, by which the mains
voltage can be transformed into a harmless low
voltage, which is used to warm up the stylus. The
temperature of the stylus can be adapted by
changing the low voltage. This can be done
gradually (3, 6, 9, or 12 Volt) or continuously
between 0 and 12 Volt. The best results are
obtained with a transformer which can be adjusted
continuously.
- a stylus holder that is handy and able
to protect you from the heat, which is
indispensable to work comfortably for a longer
time.
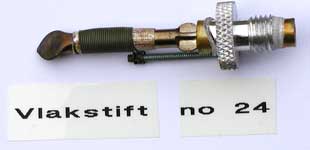
- a basic set of pyrographic styluses by
which various patterns can be burnt into wood.
Pyrography styluses exist in different forms and
sizes.
|
| |

|
| |
In the beginning only a few basic styluses are
sufficient to experiment with. If necessary later on
additional ones can be acquired. Hereafter some
examples of the result that can be obtained with the
most important styluses :
|
| |
|
| |
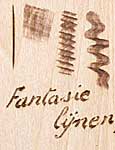
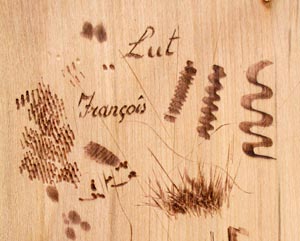
Before taking the first steps in pyrography one has
to try out the styluses and their possibilities:
dots, letters, flat and curved lines, larger
surfaces, carvings, aso� By changing the temperature
coloured patterns can be tested, going from light
brown to nearly black.
|
| |
|
| |
|
| |
|
| |
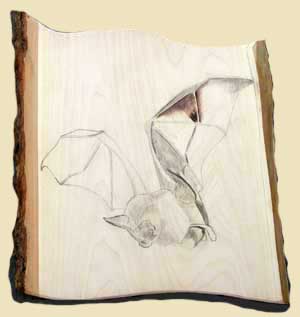
The next step consists in copying the basic drawing
onto wood. Sometimes one wrongfully thinks that
knowing how to draw or having got an artistic
education is indispensable for pyrography. Someone
who has a talent for drawing can indeed benefit of
his creativity. But someone who does not know how to
draw at all, can easily, copy the pattern of a
drawing onto wood by tracing or using a
raster.
|
| |
|
| |
|
| |
|
| |
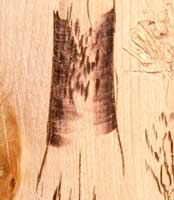
And then one needs the courage : starting off with
easy drawings and patterns, experiment, be critical
towards the obtained result and start over and over
again.
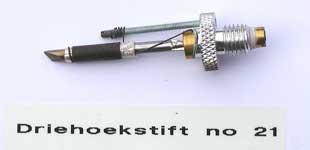
Slight fading can be obtained by moving a triangular
stylus or a flat stylus at a low temperature, with a
sliding movement, over the wood.
|
| |
|
| |
If you do not see the movie, check the
configuration of your browser.
|
| |
|
| |
Grass patterns are obtained by stinging the
styluses into the massive wood or by scraping and
then by scorching the upper part of the wood whereas
the curved parts remain untouched.
|
| |
|
| |
If you do not see the movie, check the
configuration of your browser.
|
| |
|
| |
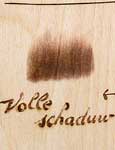
Relief can be obtained by pressing a lukewarm flat
stylus for some time on the places where one wants
to obtain a submerged effect.
In pyrography there is only one rule : only
experience can teach you !
|
| |
|
| |
Information and prices related to pyrography devices
can be found on the ARTOBI website
(Sint-Katelijne-Waver near Mechelen, Belgium). In
the online shop, go to the
"Kunst-pyrogravure" department, where you
will find the base equiment to start with. Click on
the figure below to access this website.
|
|
|